
Wall
where the via ferrata lies
Photo 1 of 18
© gb for trekking-etc.it

Panorama
from the road approaching the church
Photo 2 of 18
© gb for trekking-etc.it

Church
of Monte Albano
Photo 3 of 18
© gb for trekking-etc.it

Ferrata
initial section
Photo 4 of 18
© gb for trekking-etc.it

Ferrata
a short wall
Photo 5 of 18
© gb for trekking-etc.it

Ferrata
crossing to the right
Photo 6 of 18
© gb for trekking-etc.it

Ferrata
long vertical dihedral
Photo 7 of 18
© gb for trekking-etc.it

Ferrata
exposed crossing to the left
Photo 8 of 18
© gb for trekking-etc.it

Ferrata
another short dihedral
Photo 9 of 18
© gb for trekking-etc.it

Exposed position
Photo 10 of 18
© gb for trekking-etc.it

Ferrata
ledge to the left
Photo 11 of 18
© gb for trekking-etc.it

Ferrata
wall
Photo 12 of 18
© gb for trekking-etc.it

Ferrata
exposed crossing to the left
Photo 13 of 18
© gb for trekking-etc.it

Ferrata
end of ledge and route book
Photo 14 of 18
© gb for trekking-etc.it
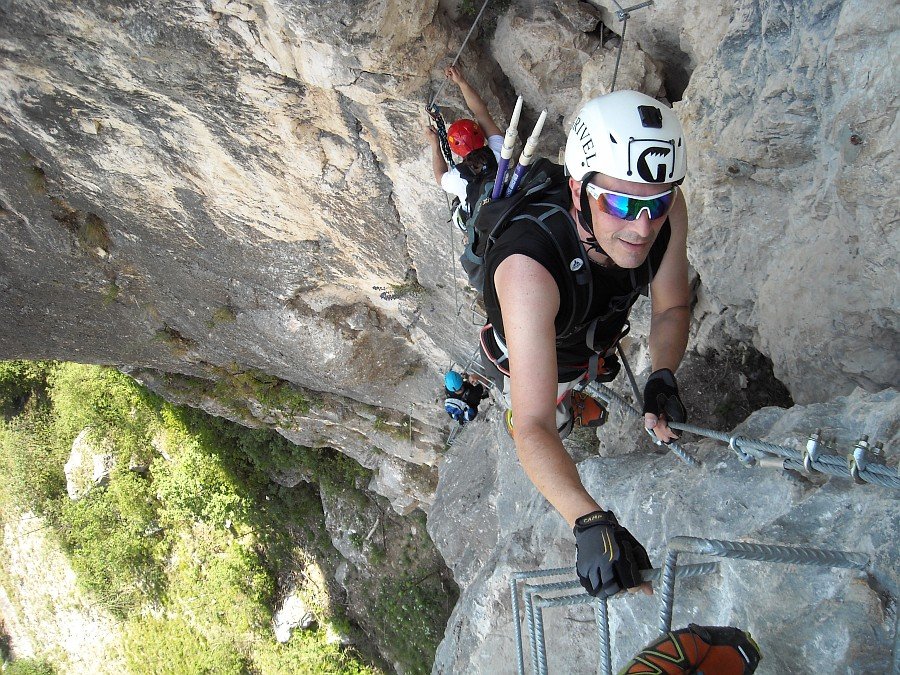
Ferrata
second long vertical dihedral
Photo 15 of 18
© gb for trekking-etc.it

Ferrata
the old exit section, on a ramp
Photo 16 of 18
© gb for trekking-etc.it

Ferrata
the new exit section, on an overhanging wall
Photo 17 of 18
© gb for trekking-etc.it

Panorama
on Mori and the Vallagarina
Photo 18 of 18
© gb for trekking-etc.it